반응형
ubuntu 18.04에서 설치하기
sudo apt-get install zsh
sudo sh -c "echo 'deb http://download.opensuse.org/repositories/shells:/zsh-users:/zsh-completions/xUbuntu_18.04/ /' > /etc/apt/sources.list.d/shells:zsh-users:zsh-completions.list"
wget -nv https://download.opensuse.org/repositories/shells:zsh-users:zsh-completions/xUbuntu_18.04/Release.key -O Release.key
sudo apt-key add - < Release.key
sudo apt-get update
sudo apt-get install zsh-completions
zsh-completions 의 경우 만약 다른 버전의 우분투나 다른 리눅스 배포판에 설치하는 경우 아래 링크에 접속해서 해당 배포판의 버전에 따른 설치방법을 참고하여 설치한다.
oh-my-zsh 설치
sh -c "$(curl -fsSL https://raw.githubusercontent.com/robbyrussell/oh-my-zsh/master/tools/install.sh)"
테마 변경하기
oh-my-zsh의 기본 테마는 robbyrussell이다. 다른 테마로 변경해보자.
vim ~/.zshrc
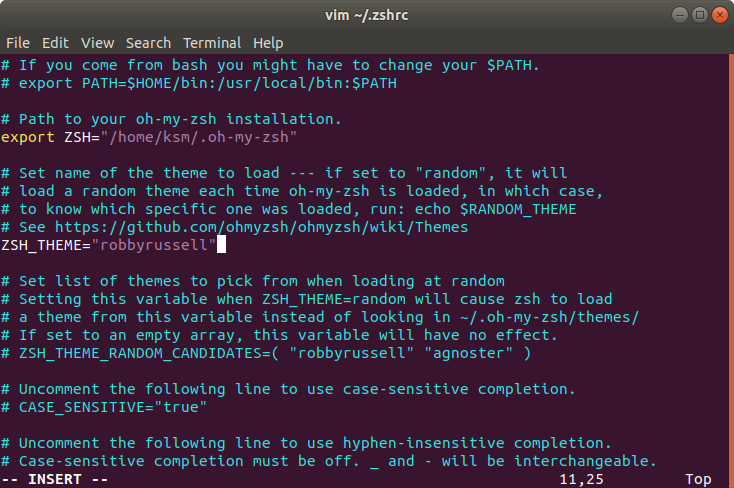
# ZSH_THEME="robbyrussell"
# ZSH_THEME="agnoster"
ZSH_THEME="random"
기본으로 설정되어있는 ZSH_THEME="robbyrusell"을 다른 테마 이름으로 바꿔서 변경한다. 여러가지 테마를 써보고 싶은 경우는 random으로 설정한 후 source ~/.zshrc를 입력할 때 마다 새로운 테마로 새로고침 된다.
플러그인 설정하기 [zsh-syntax-highlighting / zsh-autosuggestions]
# zsh-syntax-highlighting
git clone https://github.com/zsh-users/zsh-syntax-highlighting.git ${ZSH_CUSTOM:-~/.oh-my-zsh/custom}/plugins/zsh-syntax-highlighting

# zsh-autosuggestions
git clone git://github.com/zsh-users/zsh-autosuggestions $ZSH_CUSTOM/plugins/zsh-autosuggestions
설치 후 다시 들어가서 수정한다.
vim ~/.zshrc
Before:
plugins=(git)After:
plugins=(
  git
  zsh-syntax-highlighting
  zsh-autosuggestions
)
추가적인 플러그인 설치 및 출처는 아래 링크와 같다.
반응형
'개발환경 > Ubuntu' 카테고리의 다른 글
| Ubuntu Terminal solarized 테마 적용하기 (0) | 2020.09.04 |
|---|---|
| Ubuntu 18.04 고정 IP 설정 (0) | 2020.04.28 |
| 셸 (Shell) 의 이해와 종류, Shell 확인 (0) | 2020.04.15 |
| htop과 nvidia-smi 로 CPU/GPU 모니터링 하기 (2) | 2020.04.13 |
| 우분투에서 크롬(Chrome) 설치 / 다운로드 하기 (0) | 2020.04.09 |


댓글